What is Bed-In?
For optimal use of any given brake system, the pads and rotor have to be compatible with each other. The bed-in procedure establishes that compatibility between the pad and rotor. This is achieved by a combination of rubbing speed, temperature, line pressure, and inertia. Bed-in is also influenced by pad and rotor material chemistries. It is always recommended that only compatible pads and rotors be used in any given application.
Bed-in Advantages
- Gradually heat treats the rotor and eliminates any thermal shock in the rotor
- Burn off volatiles and moisture from the resin that is near pad surface, this helps to eliminate “green fade.”
- Establish a layer of transfer film about a few microns thick on the rotor surface. Shearing of the film during friction is an effective source of friction force. Otherwise, when using a freshly ground rotor without the transfer film, the main friction force would come from cutting, ploughing, or scoring the asperities on the rotor surface. This leads to inconsistent braking effectiveness.
- Mate the two surfaces to a near perfect geometrical match, so that the contact area is high, and therefore the friction force is increased.
- The performance of a fresh rotor/fresh pad system would be inconsistent. This is due to ever-changing structures and properties of the two mating materials. Bed-in of pads and rotor will form a stable transfer film.
- If bedding in procedure is not applied, a stable transfer film may not be established for a long time. In other words, the rotor surface would have to be constantly regenerating a film that is not quite stable for a long time. This effect would reduce the performance and increase the wear.
Precautions and Recommendations
- Ensure pad and rotor surface is clean and free from dirt, grease and debris. Only brake cleaner should be used on both sides of the rotor to ensure a clean surface.
- If there is any unusual feeling (e.g. shudder, vibration, noise) from the brake system, stop the process immediately and check the install.
- Perform the bed-in procedure in a safe clean environment and away from traffic.
- If possible, avoid using (or resting on) the brakes after steps 1&2 in the procedure.
- As the pad and rotor generates large levels of heat during the bed-in process, smoke and smell may be expelled from the brake setup.
Intima SS & SR Bed-In Procedure
- After installing new or machined rotors, perform 5 slow-downs applying moderate pressure from approximately 60 km/h to 10km/h WITHOUT coming to a complete stop with 300 meters (15-20 seconds) between each slow-down.
- Make an additional 3 slow-downs, applying heavy pressure from approximately 70 km/h to 10km/h WITHOUT coming to a complete stop.
- Allow at least 15 minutes for brake system to cool down. After step 3 your brake pads are ready for normal use.
Type-D v2.0 Bed-In Procedure
- After installing new or machined rotors perform 5 slow-downs applying moderate pressure from approximately 60km/h to 5km/h with 50 metres between each slow-down. DO NOT DRAG BRAKES.
After each slowdown, increased braking friction should be experienced. - Where it is safe to do so, make an additional 5 slow-downs applying heavy pressure from approximately 80-100km/h to 10km/h. DO NOT DRAG BRAKES OR ENGAGE ABS.
- Allow at least 20 minutes for the brake system to cool down.
- Prior to initial hard track use, street driving for 200kms+ and/or several warm up laps applying gentle brake pressure is strongly recommended to completely surface the pad to the rotor to ensure the bed-in process is complete.
Intima RS Bed-In Procedure
– Updated 01/2022 –
The Carbon-Kevlar composition of the Intima RS is relatively non aggressive compared to Carbon-Metallic compounds and as a result may take longer to fully surface with disc rotors. Ensuring they are properly bedded in with your disc rotors will take time, patience and understanding of the process below.
- Starting from a low speed and progressively increasing pedal pressure and speed is the recommended procedure to fully surface the Intima RS compound to the rotor in 1 bed in cycle.
- Where it is safe to do so, perform 5 consecutive slowdowns from 60km/h to 10km/h with moderate pedal pressure.
- With heavy pedal pressure, perform 3 hard stops from 100km/h to 50km/h then 3 hard stops from 100km/h to 10km/h with 10-20 second intervals between each slow down. Avoid activating ABS and resting on the brakes if at a full stop during the process.
- Allow 15 minutes for the brake system to cool down.
- To confirm pads have bedded in successfully, perform 4 hard stops at high speed ensuring ample forward run off space as a precaution. If green fade* is experienced (see below), repeat from step 3 of the bed in process.
Motorsport and track only customers have reported that the Intima RS can work immediately without bed-in however this has not been officially tested and the customer will own the risk and outcome by not performing the recommended bed-in process.
Intima RR Bed-In Procedure
1. Starting from a low speed and progressively increasing pedal pressure and speed is the recommended procedure to fully surface the Intima RR compound to the rotor in 1 bed in cycle.
2.Where it is safe to do so, perform 5 consecutive slowdowns from 60km/h to 10km/h with moderate pedal pressure. Do not drag brakes, push and release the pedal quickly.
3.With heavy pedal pressure, perform 3 hard slowdowns from 100km/h to 50km/h then 3 hard stops from 100+km/h to 10km/h with 10-20 second intervals between each slow down. Do not drag brakes, avoid activating ABS and resting on the brakes if at a full stop during the process.
4. Allow 15 minutes for the brake system to cool down.
5. Always warm up the brake system before hard track use.
*Green Fade occurs during the initial bed-in process when the brake pads are surfacing to the disc rotor. The symptom is the feeling of initial pad friction (bite) then continual and rapid loss of friction often referred to as the “long pedal”. This can occur post bed-in due to a multitude of factors such as old pad material, rotor surface condition, type of car and brake setup. As a result, a 2nd and in rare circumstances a 3rd bed-in cycle is required for your new Intima brake pads to be completely surfaced to the rotor and performing 100% optimal.
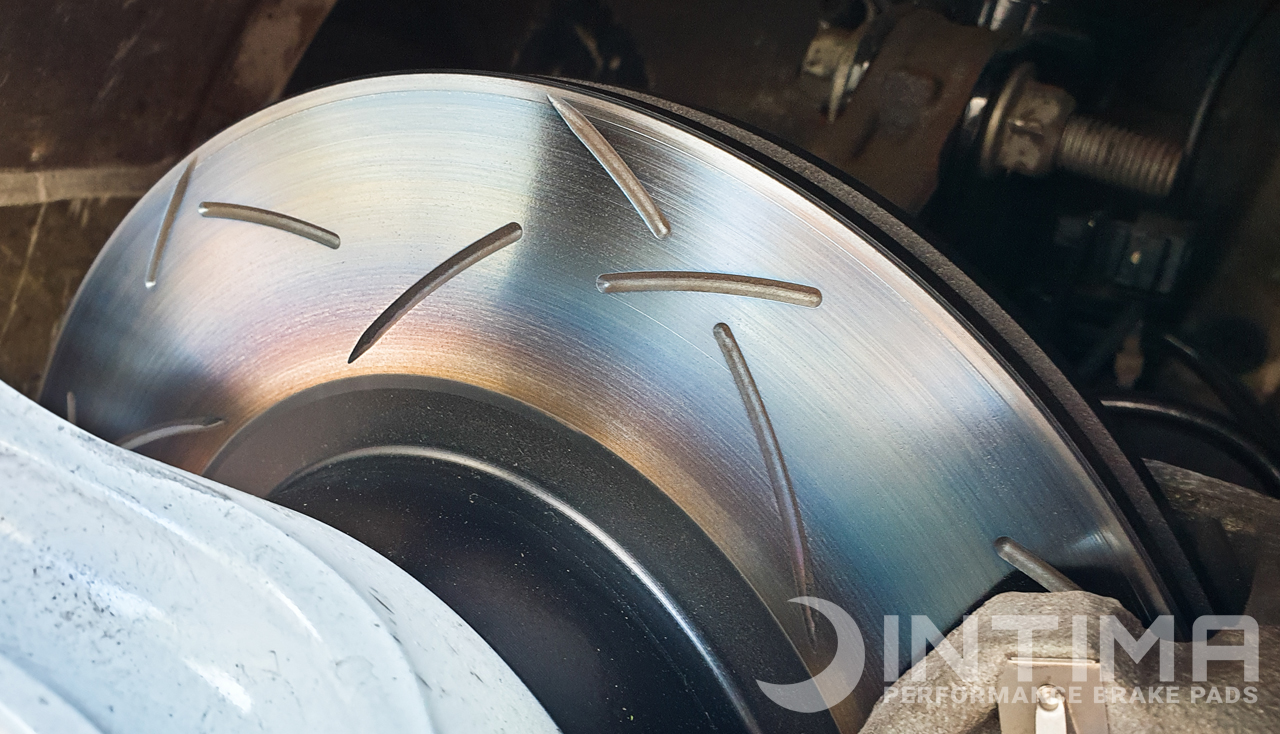
The blue transfer film on rotors after a bed-in cycle is often a good sign that your Intima brake pads are surfaced to the rotor however precaution still needs to be undertaken to ensure they are 100% surfaced for optimal pad performance and longevity.

